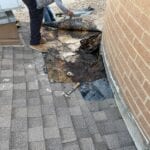
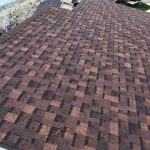
Roof damage in 80015 Centennial Colorado in May 2023. New Roof Plus replaced this damaged roof.

My Hail Damaged Roof in Zip Code 80015 – What Next?

Having a hail-damaged roof can be a stressful situation, especially if you’reRoof damage in 80015 Centennial Colorado in May 2023. New Roof Plus replaced this damaged roof. unsure about what steps to take next. If you own a home in Centennial or Parker Colorado you may find yourself in this predicament – especially in Zip Code 80015! But don’t worry! This comprehensive guide will walk you through the necessary actions to address your hail-damaged roof effectively. From assessing the damage to filing an insurance claim, we’ve got you covered. So, let’s dive in and explore what you should do next when faced with a hail-damaged roof from the recent storms that hit Centennial and Parker and the areas surrounding Zip Code 80015.

Assessing the Damage: How Bad Is It?

When it comes to hail damage, it’s crucial to assess the severity before taking any further action. Here’s what you should do to determine the extent of the damage:

  1. Visual Inspection: Start by visually inspecting your roof from the ground. Look for any obvious signs of damage, such as missing or cracked shingles, dents in gutters, or loose roofing material. Take note of any visible issues for future reference.
  2. Check Attic: Head up to your attic and inspect the ceiling and walls for any water stains or signs of leakage. Hail damage can lead to compromised roof integrity, resulting in water seepage.
  3. Hire a Professional: Consider reaching out to a reputable roofing contractor, like New Roof Plus, that works in Zip Code 80015, to conduct a thorough inspection. They have the experience and expertise to identify hidden damages that may not be apparent to an untrained eye.

Taking Immediate Action: Temporarily Fixing the Roof

Hail Damaged Roof in 80015 Centennial COWhile waiting for repairs or insurance claims to be processed, it’s essential to take some immediate steps to prevent further damage to your hail-damaged roof. Follow these tips to provide temporary protection:
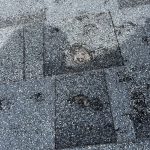
  1. Cover Openings: If you notice any areas where the roof is compromised, cover them with a tarp or temporary sealant. This step will help prevent water from entering your home and causing additional damage.
  2. Clear Debris: Remove any debris, such as fallen branches or leaves, from the roof. These items can obstruct drainage and worsen the condition of your damaged roof.
  3. Document the Damage: Take clear photographs of the hail damage as evidence for your insurance claim. Make sure to capture both close-up shots and wide-angle views to provide a comprehensive overview.

Understanding Insurance Coverage: Does It Include Hail Damage?

Now that you’ve assessed the damage and taken immediate action, it’s time to delve into your insurance coverage. Here are some key points to consider:

  1. Review Your Policy: Carefully review your homeowner’s insurance policy to understand the coverage details related to hail damage. Look for specific terms and conditions, deductibles, and limitations.
  2. Contact Your Insurance Company: Reach out to your insurance company’s claims department to report the hail damage. Provide them with all the necessary information, including photographs, inspection reports, and a detailed description of the damage.
  3. Document Communication: Keep a record of all conversations, emails, and letters exchanged with your insurance company. This documentation will serve as valuable evidence throughout the claims process.

The Insurance Claim Process: Navigating the Paperwork

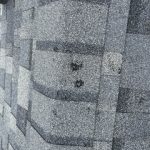
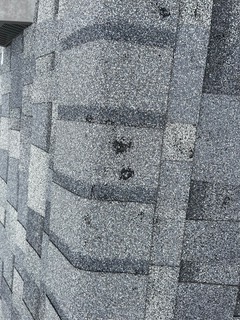
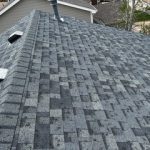
Filing an insurance claim for hail damage can be a complex process. ToHail damage from the recent hail storm that hit Centennial and other areas in Colorado. ensure a smoother experience, here’s what you need to know:
  1. File Promptly: Notify your insurance company about the hail damage as soon as possible. Many policies have strict timelines for reporting claims, and failing to adhere to them may result in denial of coverage.
  2. Provide Detailed Information: Fill out the necessary claim forms accurately, providing all the requested information. Be specific about the date, time, and location of the hailstorm, as well as the extent of the damage.
  3. Obtain Multiple Quotes: Request estimates from licensed roofing contractors that service Zip Code 80015 for the repairs. Having multiple quotes will strengthen your claim and ensure a fair settlement.
  4. Consider Public Adjusters: If you encounter difficulties during the claims process, you may choose to hire a public adjuster. These professionals advocate on your behalf and help maximize your claim.

FAQs About Hail Damaged Roofs in Zip Code 80015

  1. Q: Can I repair the hail damage myself?
    • A: While some minor repairs can be DIY projects, it’s generally recommended to hire a professional roofing contractor. They have the necessary skills and equipment to ensure a thorough and long-lasting repair.
  2. Q: How long does the insurance claims process take?
    • A: The timeline for the insurance claims process can vary depending on the complexity of the damage and your insurance company’s procedures. Typically, it takes a few weeks to a few months to resolve the claim.
  3. Q: Will my insurance rates increase if I file a claim for hail damage?
    • A: Filing a claim for hail damage may or may not impact your insurance rates. It’s best to consult with your insurance company directly to understand their specific policies.
  4. Q: What if the insurance settlement is insufficient to cover the repairs?
    • A: If the insurance settlement falls short, you can explore options such as negotiating with your insurance company, filing an appeal, or supplementing the funds from your own pocket.
  5. Q: How can I find a reliable roofing contractor in Zip Code 80015?
    • A: Seek recommendations from friends, family, or neighbors who have recently had their roofs repaired. Additionally, online review platforms like the BBB, Google Reviews and contractor directories can provide valuable insights into the reputation and quality of local contractors.
  6. Q: Can I prevent future hail damage to my roof?
    • A: While you can’t control the weather, you can take preventive measures to minimize the impact of hail. Consider installing impact-resistant roofing materials and regularly maintaining your roof to ensure its durability.

Conclusion

Hail damaged roof in Centennial Colorado from May 2023 storm.Dealing with a hail-damaged roof is an inconvenience whether you live in Zip Code 80015 or anywhere in Colorado because it requires prompt action and careful navigation of the insurance claims process. By assessing the damage, taking temporary measures, understanding your insurance coverage, and filing a claim diligently, you can ensure a smoother road to recovery. Remember to document all communication and seek professional assistance when needed. With the right approach, your hail-damaged roof will soon be repaired, restoring safety and security to your home in Zip Code 80015.
 

Haag Certified Roofing Inspector logo for New Roof Plus

Step by Step: Hail Damaged Roof Action Plan

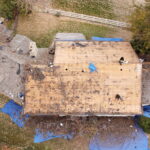
Hailstorms can be a destructive force of nature, leaving behind a trail of damage to properties, particularly roofs. If you find yourself dealing with aRoof repair company New Roof Plus finds hail damage on this home in Erie Colorado May 2023 hail-damaged roof in Centennial or Parker, Colorado, it’s crucial to know what steps to take to ensure the safety of your home and initiate the repair process promptly. In this comprehensive guide, we will walk you through the necessary actions to address the situation effectively and get your roof back in top shape.
Step by Step: What to do if you have a hail-damaged roof in Centennial and Parker Colorado from a recent storm.

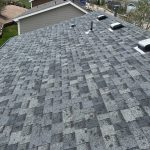
New roof installation from New Roof PlusDealing with a hail-damaged roof can be overwhelming, but following these steps will help you navigate the situation with ease and efficiency:
    1. Assess the damage: Start by examining your roof for any visible signs of damage. Look for dents, cracks, missing shingles, or granule loss. If you feel uncomfortable or unsure about climbing onto your roof, it’s best to hire a professional roofing contractor to perform the inspection.
    2. Contact your insurance company: Once you’ve assessed the damage, reach out to your insurance company to file a claim. Provide them with accurate information about the extent of the damage and any supporting documentation or photos you have.
    3. Document the damage: Take clear photographs or videos of the hail damage to your roof. These visual records will serve as valuable evidence during the insurance claims process.
    4. Seek professional assistance: Engage the services of a reputable roofing contractor who specializes in hail damage repairs. Make sure they are licensed, insured, and experienced in working with insurance claims.
    5. Obtain multiple estimates: It’s wise to obtain multiple estimates from different roofing contractors to compare prices and services. This will help you make an informed decision when selecting a contractor to repair your hail-damaged roof.
    6. Check your insurance policy: Review your insurance policy to understand the coverage you have for hail damage. Pay attention to deductibles, coverage limits, and any specific requirements or exclusions.
    7. Schedule the repairs: Once you have chosen a roofing contractor, schedule the repair work at a convenient time. Coordinate with the contractor to ensure they have all the necessary materials and permits.
    8. Temporary fixes: In case of leaks or further damage, consider implementing temporary fixes like covering damaged areas with tarps or plastic sheets to prevent water intrusion until the repairs can be completed.
    9. Keep documentation: Throughout the entire process, keep detailed records of all communication, including phone calls, emails, and written correspondence. This documentation will help you track progress, provide evidence if needed, and facilitate smooth communication with your insurance company.
    10. Follow up with the insurance company: Stay in contact with your insurance company to stay updated on the progress of your claim. Ask about any additional documentation or information they may require.
    11. Coordinate with your contractor: Communicate regularly with your roofing contractor to stay informed about the repair timeline and any unexpected issues that may arise during the process.
    12. Inspect the repairs: Once the repairs are complete, carefully inspect the work to ensure it meets your expectations and addresses all the identified hail damage. Discuss any concerns or issues with your contractor promptly.
    13. Finalize the insurance claim: Once you are satisfied with the repairs, notify your insurance company. They will typically send an adjuster to inspect the completed work and finalize the claim.

14. Preventive measures: After experiencing hail damage, it’s essential to take preventive measures to minimize the risk of future damage.

Consider the following:

      • Install impact-resistant roofing materials: Opt for impact-resistant shingles or metal roofing that can withstand hailstorms better than traditional materials.
      • Trim overhanging trees: Trim tree branches that hang over your roof to prevent them from causing additional damage during a hailstorm.
      • Regular roof inspections: Schedule regular roof inspections by professionals to identify and address any vulnerabilities or maintenance issues.
      • Maintain gutters and downspouts: Ensure your gutters and downspouts are clear of debris to prevent water backup, which can lead to leaks and further damage during heavy rain or hailstorms.
      • Consider hail-resistant covers: Explore the possibility of installing hail-resistant covers for vulnerable areas, such as skylights or vent pipes.

15. Frequently Asked Questions (FAQs):

Can I assess hail damage on my roof without climbing up?

While it’s best to have a professional inspect your roof, you can often identify some signs of hail damage from the ground. Look for visible dents, cracks, or missing shingles. However, for a thorough assessment, it’s recommended to hire a roofing professional.

How long do I have to file an insurance claim for hail damage?

Insurance companies usually have specific timelines for filing claims after an incident. Check your insurance policy or contact your insurance provider to determine the deadline for filing a hail damage claim.

Will my insurance cover the full cost of repairs?

The coverage for hail damage repairs varies depending on your insurance policy. Review your policy to understand the deductibles, coverage limits, and any exclusions that may apply.

Should I get multiple estimates for repairs? 

Obtaining multiple estimates from different roofing contractors allows you to compare prices, services, and credibility. It’s advisable to gather multiple estimates to make an informed decision.

What if I discover additional damage during the repair process?

If your roofing contractor identifies additional damage during the repair process, inform your insurance company immediately. They may send an adjuster to reassess the damage and adjust the claim accordingly.

Can I perform temporary repairs on my own?

If you’re comfortable with DIY repairs, you can implement temporary fixes such as covering damaged areas with tarps or plastic sheets. However, it’s crucial to remember that these are temporary solutions, and professional repairs are necessary for a long-term fix.

Final Thoughts

Experiencing hail damage to your roof can be stressful, but by following the appropriate steps, you can address the situation effectively. Start by assessing the damage and contacting your insurance company to initiate the claims process. Seek professional assistance from a reputable roofing contractor like New Roof Plus, and maintain clear communication throughout the repairs.

Taking preventive measures can also help minimize the risk of future damage. Remember to document all communication and stay organized throughout the process. By being proactive and thorough, you can restore your hail-damaged roof and protect your home from further harm.

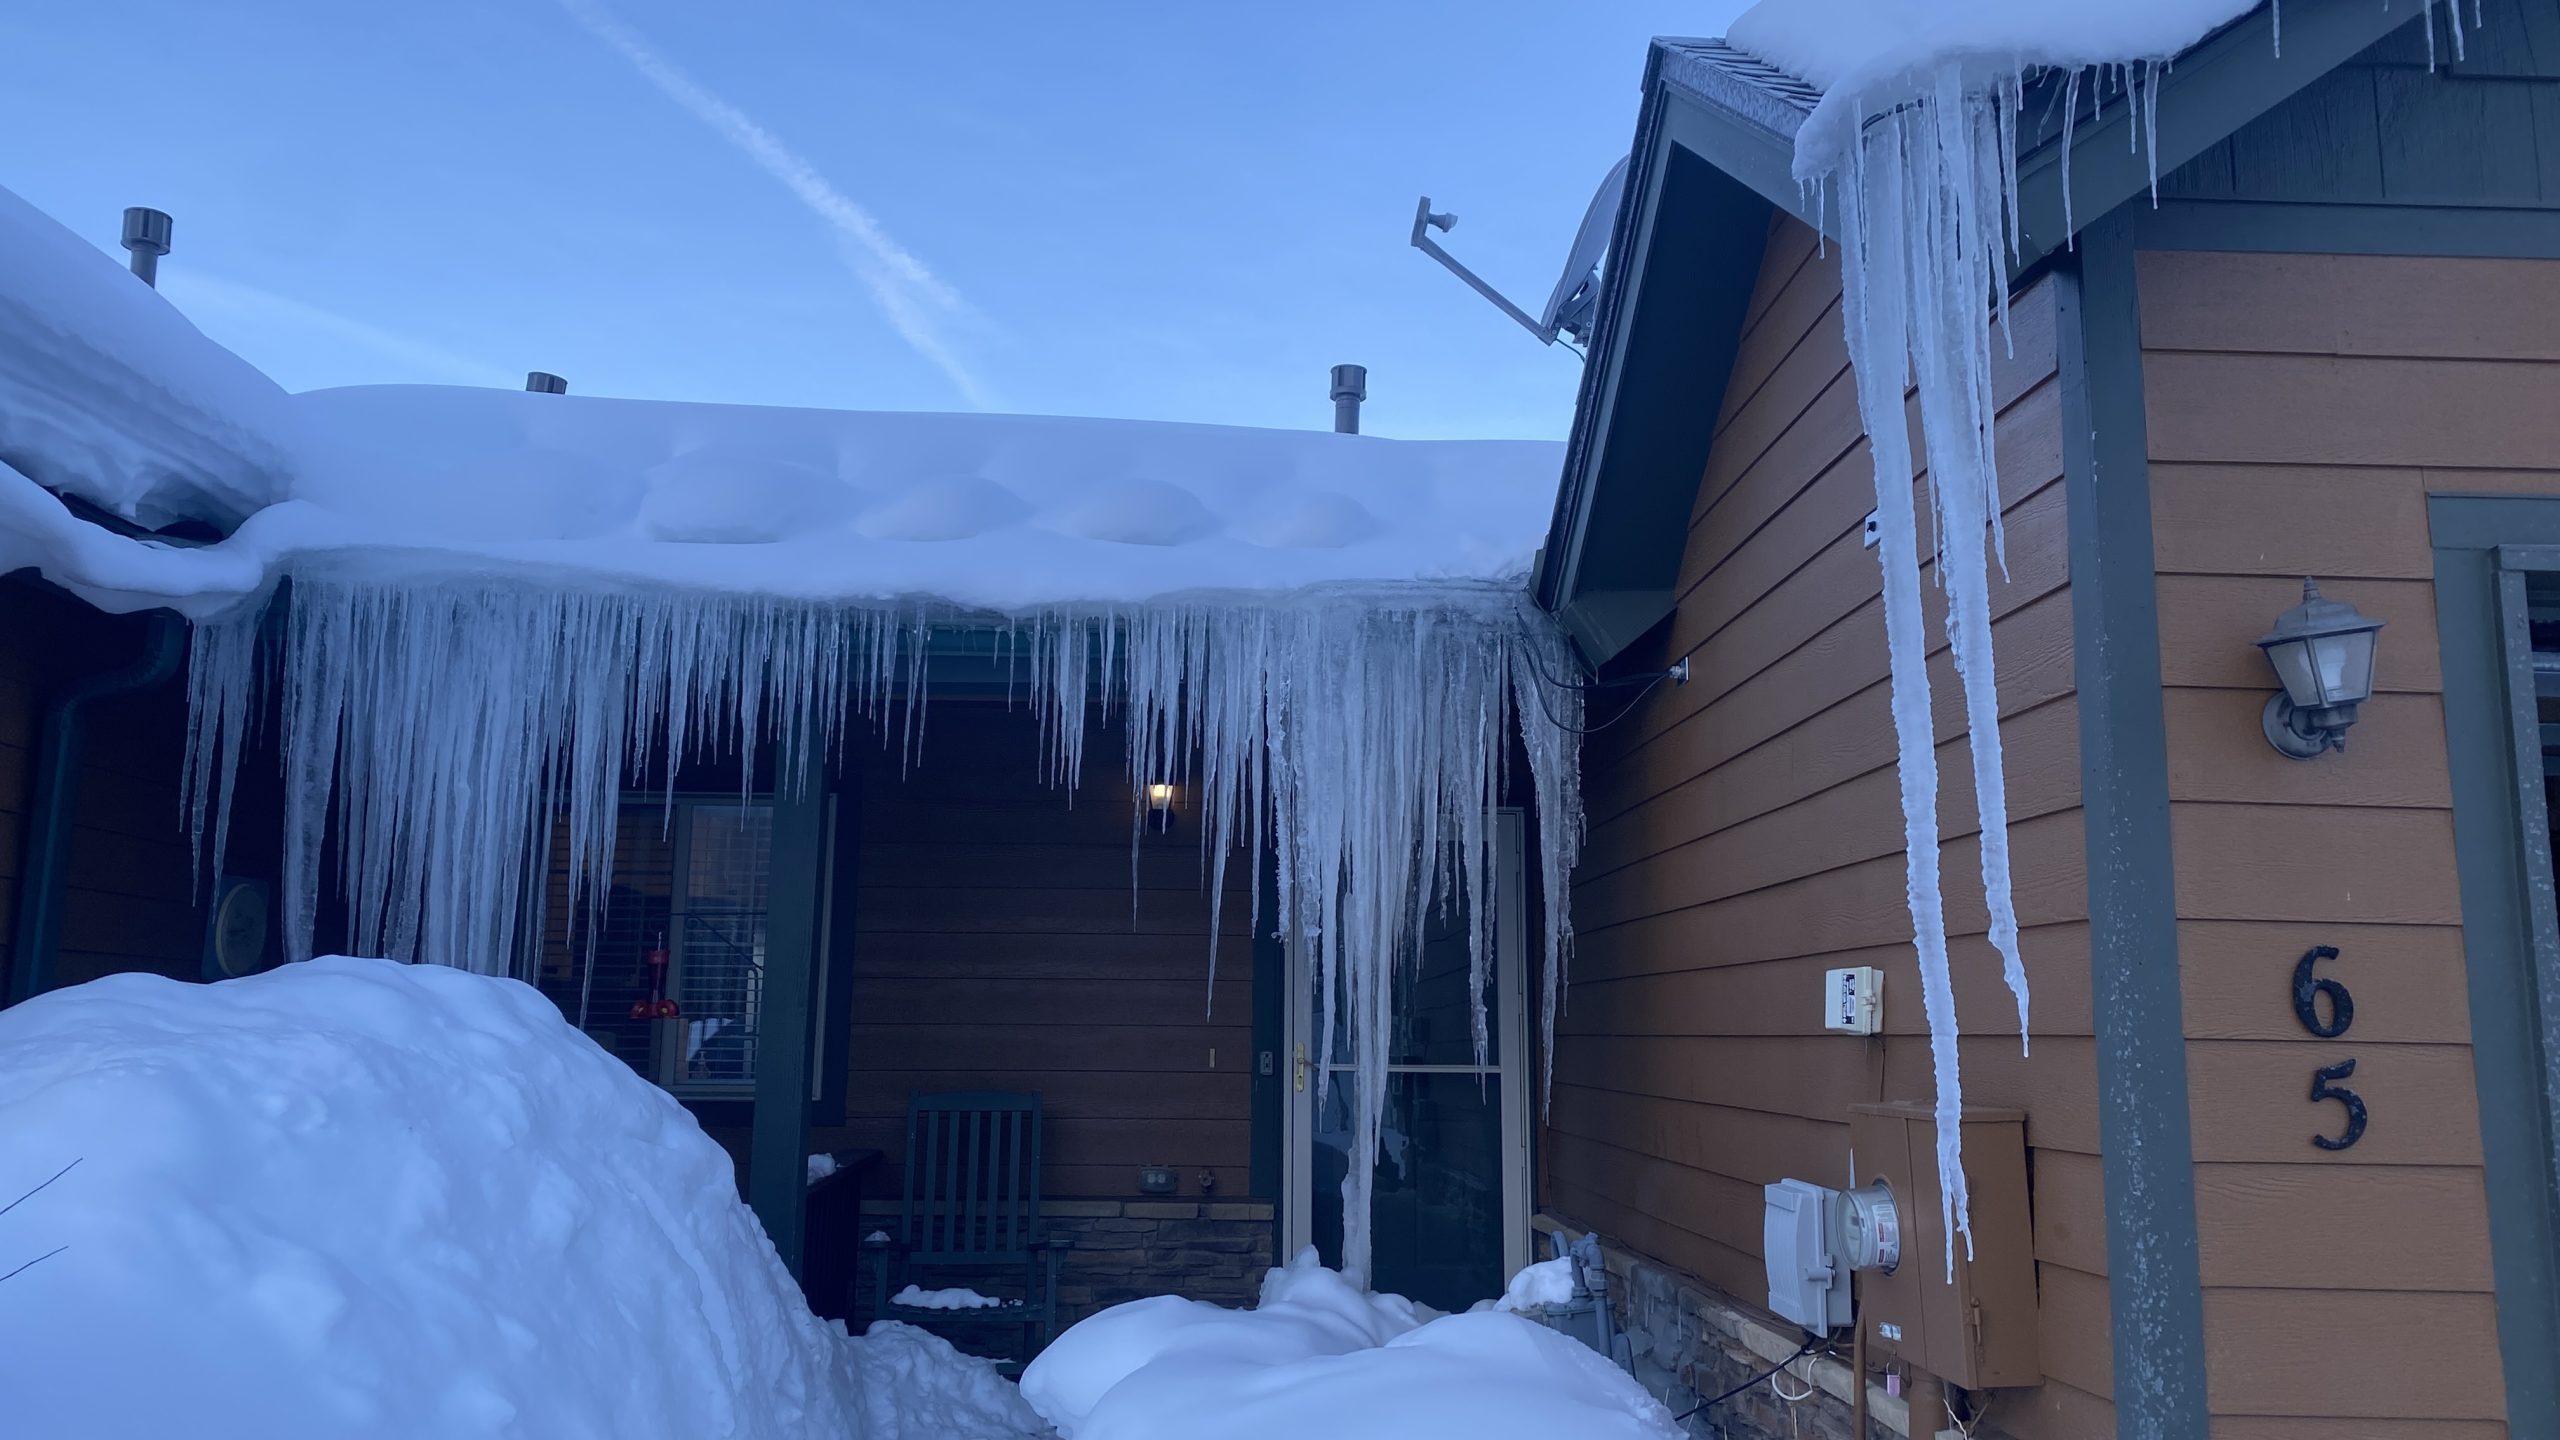
Ice damming on home in Winter Park Colorado. Heat cables were not working properly.

How to Prevent Ice Damming on Your Roof with Heat Cables

Winter weather in Colorado can be tough on your residential home or commercial building. One of the most common issues homeowners in the mountains, foothills, and even in the Denver Metro area of Colorado need to deal with is ice damming on their roofs. In this post, we’ll explore what ice damming is, how it can cause damage to your home, and how heat cables, when properly installed, can prevent it.

What is Ice Damming on Roofs?

Ice damming occurs when snow and ice accumulate on your roof, and then melt due to warm air escaping from your attic. The melted snow and ice then refreeze along the edges of your roof, creating a dam in the gutter that prevents water from properly draining off the roof.

Understanding the Damage Caused by Ice Damming

Ice damming can cause serious damage to your home, including:

  • Water damage to your ceilings and walls
  • Damage to your roof shingles and underlayment
  • Damage to your gutters and downspouts
  • The growth of mold and mildew in your home

Ice damming on home in Winter Park Colorado. Heat cables were not working properly.How Heat Cables Prevent Ice Damming

Heat cables are one solution to the problem of ice damming. These cables can be installed along the edges of your roof to melt the snow and ice, allowing water to flow off the roof properly. Heat cables work by heating up when they detect the presence of snow or ice, which then melts the snow or ice before it can accumulate and cause a dam.

Installing Heat Cables on Roofs: Best Practices

If you’re interested in installing heat cables on your roof, here are some best practices to keep in mind:

  • Before purchasing heat cables, measure the length of the areas on your roof where you want to install them. This will help you determine the amount of cable you need to buy.
  • Make sure to buy heat cables that are specifically designed for outdoor use and are rated for the amount of snow and ice that your area typically receives.
  • Consider hiring a professional, like the team at New Roof Plus,  to install the cables if you are not comfortable working on your roof, or if you have a particularly steep or high roof.
  • If you plan to install the cables yourself, make sure to follow the manufacturer’s instructions carefully and use the proper safety equipment, such as a safety harness and sturdy ladder. Home Depot and other retailers sell heat cables if you are ready for a DIY effort.
  • Install the heat cables along the edges of your roof and in any areas where ice dams are prone to form, such as valleys and low-pitched areas.
  • Connect the cables to a thermostat or controller that will turn them on when the temperature drops below a certain point and turn them off when the temperature rises.

Other Winter Roof Maintenance Tips

In addition to installing heat cables, there are several other things you can do to protect your roof from winter weather damage:

  • Keep your gutters clean and free of debris so that water can flow off your roof properly. Standing water in the gutter will freeze and start the process.
  • Make sure your attic is well-insulated and properly ventilated to prevent warm air from escaping and melting snow and ice on your roof.
  • Remove any overhanging tree branches that could potentially fall on your roof and cause damage.
  • Check your roof regularly for signs of damage, such as missing or cracked shingles, and make repairs as needed.
  • Hire a professional to inspect your roof at least once a year to identify any potential issues before they become major problems.

Conclusion

Ice damming on roofs can cause serious damage to your home, but with the right preventative measures, such as installing heat cables and practicing regular roof maintenance, you can protect your home and ensure that it remains safe and comfortable throughout the winter months. By following the best practices outlined in this post, you can safeguard your roof and prevent costly repairs down the road.

New Roof Plus Roofing Company Colorado Logo

Owens Corning Shingles Preferred Installer for Denver CO

We install Owens Corning shingles in the Denver Metro area. As a Preferred Contractor – and roofing installer, New Roof Plus has the crews and management expertise to install all of the products from Owens Corning.Owens Corning Preferred Contractor logo

Owens Corning is an American-based manufacturer of roofing shingles. They are a leading manufacturer of roofing materials, including a variety of shingle options for homes in the Denver area.

Shingle Options from Owens Corning

As with any major home improvement project, it’s important to carefully consider the various options and weigh the benefits and drawbacks before making a decision. In this article, we’ll take a closer look at some of the shingle options available from Owens Corning, as well as the benefits they can provide for homes in the Denver area.

One of the most popular shingle options in Colorado from Owens Corning is the Duration Series. These shingles are made with a proprietary blend of asphalt, fibers, and mineral stabilizers, which helps them resist the elements and stay strong over time.

They also feature a unique “SureNail” technology that helps them grip the roof more securely, reducing the risk of blow-off during high winds. The Duration Series is available in a range of colors, including traditional shades like black, brown, and grey, as well as more unique options like green, blue, and red.

Duration Shingles Series from Owens Corning

Another popular option from Owens Corning is the TruDefinition Duration Series, which features a high-definition color blend and enhanced shadow effect to give a more natural, wood-like appearance.

These shingles also feature the SureNail technology, as well as a special strengthening layer that helps them resist cracking, splitting, and other forms of damage. Like the standard Duration Series, the TruDefinition shingles are available in a range of colors to suit any home’s style.

shingle color options from owens Corning
Color choices Owens Corning

Composite Shingles from Owens Corning

In addition to asphalt shingles, Owens Corning also offers a range of composite shingle options. The Oakridge Series, for example, is made with a blend of asphalt and fiberglass and features a distinctive wood-grain finish that gives it a natural, rustic look.

These shingles are also resistant to algae growth, which can be a common problem in humid or damp climates – this is not a typical problem here in Denver however. The Oakridge Series is available in a variety of colors, including shades like cedar, driftwood, and aged wood.

Dimensional Shingles

Another composite shingle option from Owens Corning is the Berkshire Collection. These shingles are made with a blend of asphalt, fiberglass, and ceramic, which gives them a unique, three-dimensional appearance that resembles slate or shake.

The Berkshire Collection is available in a range of colors, including shades like charcoal, black, and grey, as well as a rustic, weathered look. These shingles are also resistant to algae growth and are designed to withstand winds of up to 130 miles per hour.

Click here to view the entire lineup of Owens Corning Roofing Shingles.

Benefits of Owens Corning Shingles in Denver

There are many benefits to choosing Owens Corning shingles for your home in the Denver area. One of the main advantages is their durability and long lifespan. Asphalt shingles in particular are known for their longevity, and with proper care and maintenance, they can last for decades.

Composite shingles like the Oakridge Series and Berkshire Collection are also very durable and are often backed by extended warranties that provide additional peace of mind.

Another benefit of Owens Corning shingles is their energy efficiency. Many of their products are ENERGY STAR certified, meaning they meet strict energy efficiency guidelines set by the U.S. Environmental Protection Agency. This can help reduce energy costs and improve the overall energy efficiency of your home.

In addition to their durability and energy efficiency, Owens Corning shingles also offer a range of style options to suit any home’s aesthetic. Whether you prefer a traditional look or something more modern and sleek, there’s a shingle option from Owens Corning that can meet your needs.

Owens Corning: Made in Denver Colorado!

Finally, it’s worth noting that Owens Corning shingles are backed by a strong reputation for quality and customer service. The company has a manufacturing plant here in Denver.